


⚠️ This manual is for the deprecated Appcar v1.5. The manual for the latest version -> Appcar User Guide
Installation
To install the application run the file setup.exe .
Please read and accept the rules of the license agreement when installing the application.
First use
When you first start the program, go to the “Settings” tab and fill in the fields:
- User
- Password
- Server
using data received after purchase of software license.
Select the COM port that the Diagnostics Interface uses. You can check the number: from DeviceManager, select “View devices by type”, then “Ports (COM & LPT)”.
Connecting to the vehicle
Connection to the vehicle is possible when:
- In the “Settings” tab you have: (1) the appropriate COM port number under which the ELM327 diagnostic interface is available, (2) the appropriate “baud rate”
- For most devices should be set to 38400.
- For OBDLink SX should be set to 115200.
- For some devices should be set to 9600.
- The diagnostic interface is connected to the computer, whether it is connected to a USB connector or paired via Bluetooth, depending on the device version.
- The diagnostic interface is connected to the DLC diagnostic connector on the vehicle.
- The ignition switch on the vehicle is in the “Run” position – Ignition ON.
If the above conditions are met, the application will connect to the vehicle by pressing the “Connect to Vehicle” button:
![]()
The process of connecting to the vehicle is signaled by the green progress bar visible under the Buttons, as well as the information displayed in the application status bar.
Once you have connected to the vehicle, the information in the next section will be displayed in the “Vehicle” tab.
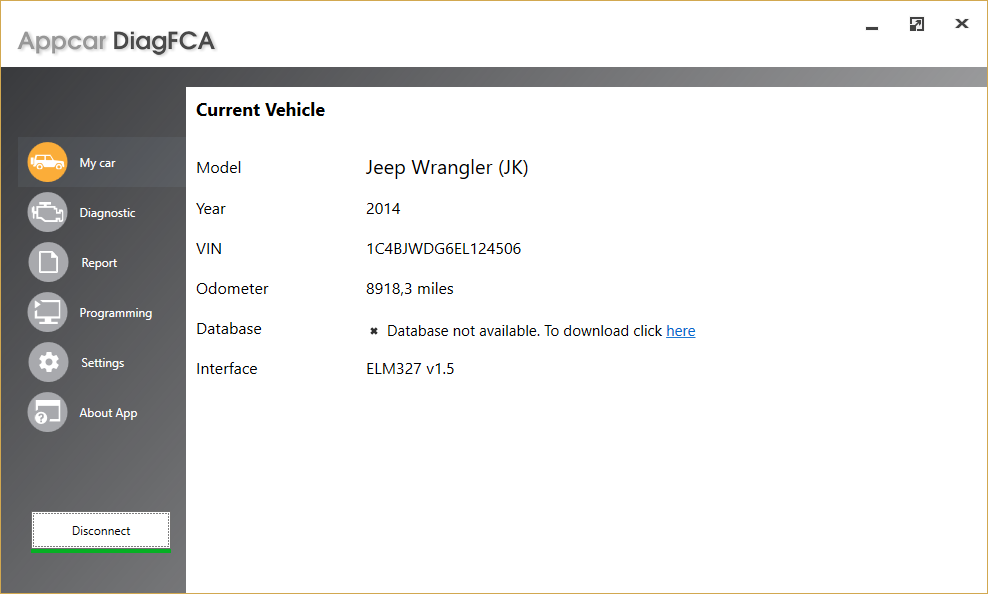
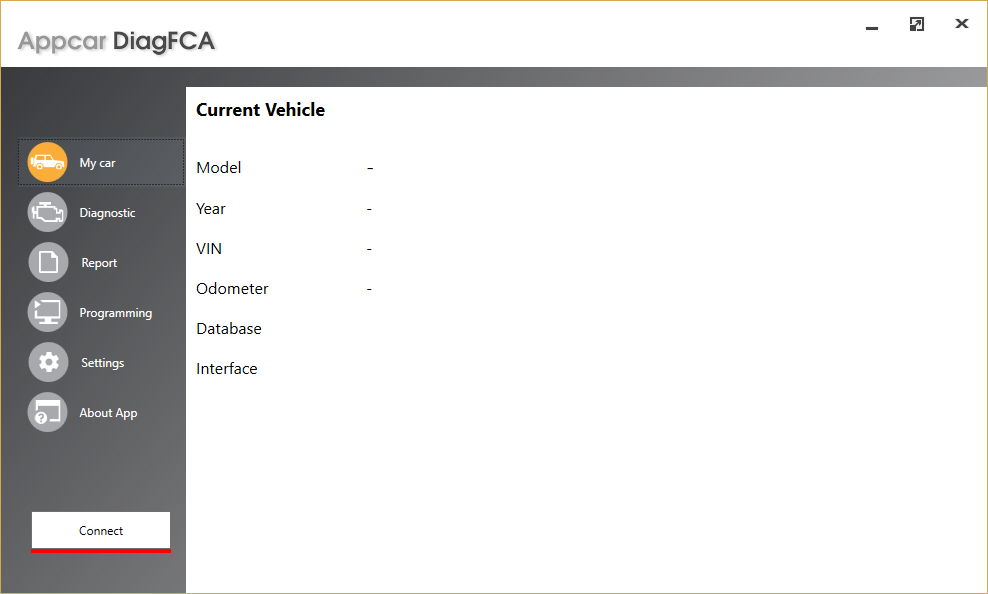
My Car tab
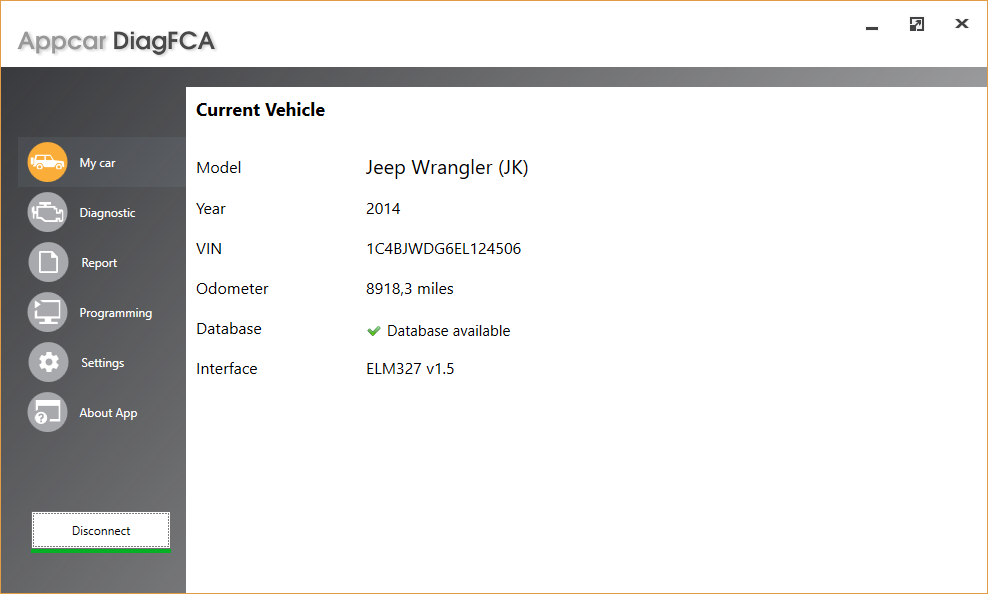
The My vehicle tab contains basic information:
- regarding the vehicle with which the connection was made,
- about the version of the diagnostic interface ELM327 compliant,
- about the diagnostic database of the vehicle with which the connection was made. Two scenarios are possible:


If the Database is not available, download it from our server by clicking “here” or by using button the “Settings” tab.
Diagnostic tab
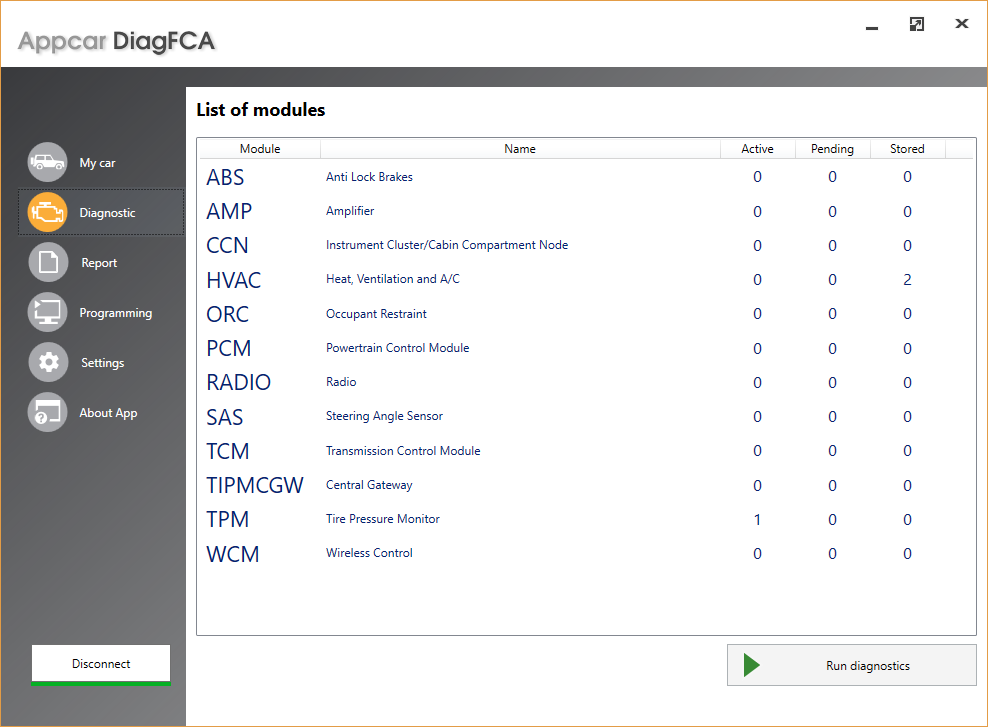
The tab contains a list of modules available on the vehicle.
The list contains the following fields:
- Module – module acronym, according to the nomenclature used by the vehicle manufacturer
- Name – full module name
- Active – The number of active DTC trouble codes read from the module
- Pending- The number of pending DTC trouble codes read from the module
- Stored – The number of stored DTC trouble codes read from the module
To access the diagnostic functions available for a particular module, double-click it in the list or select it and click the “Run Diagnostics” button.
Module info tab
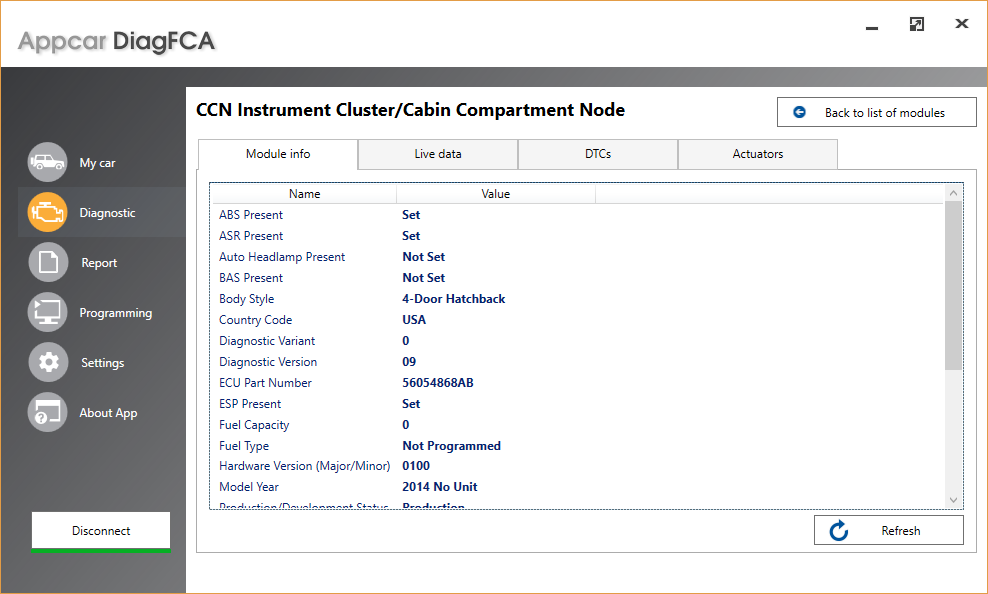
The “Module info” tab is available in the Diagnostics tab, after selecting the module. The basic information about the module – identification and configuration information is displayed.
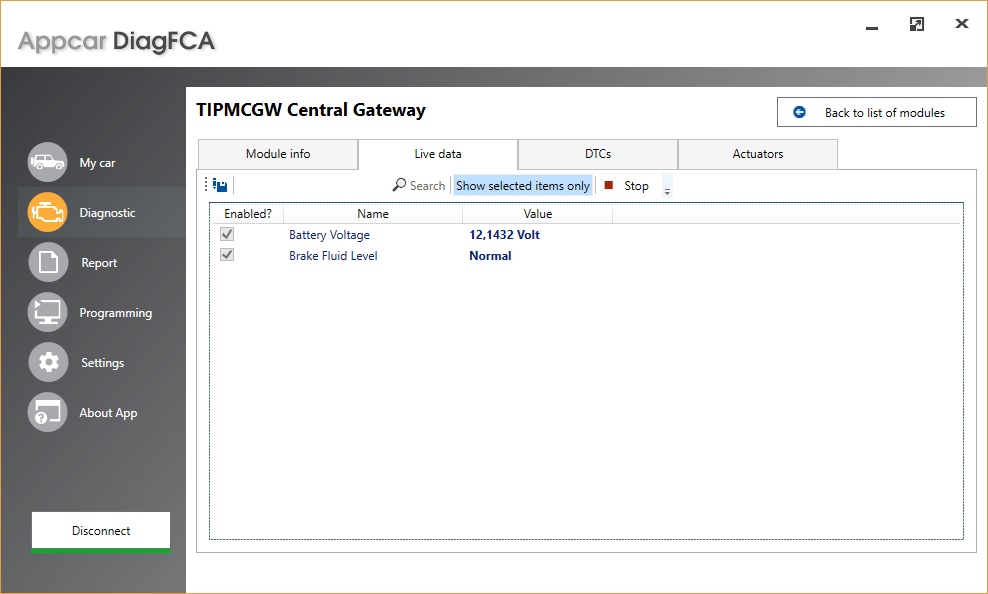
Live data tab
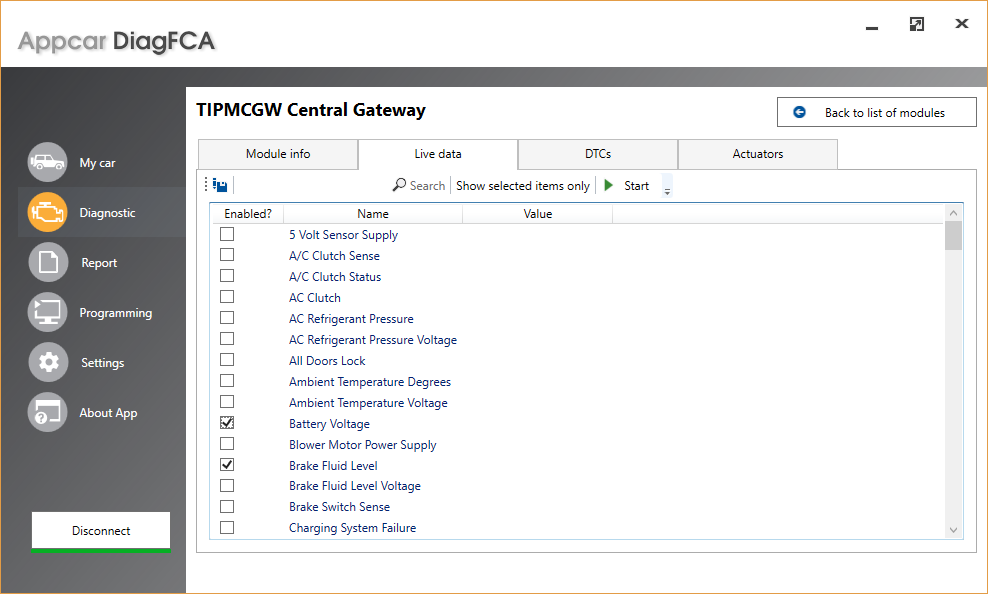
The “Live data” tab allows you to view the current values of the selected parameters of a given module.
Values are displayed for the selected parameters, after pressing the “Start” button.
The “Show selected items only” option allows you to hide inactive parameters.
DTCs tab
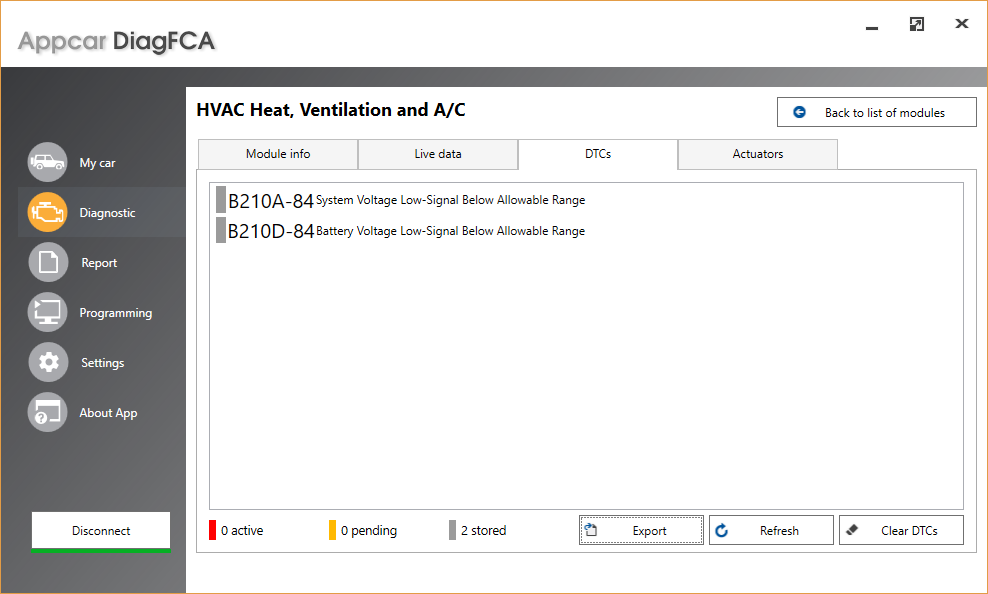
The “DTCs” tab contains a list of trouble codes read from the module.
The colors to the left of the items in the list indicate the status of the trouble code:
 means that the trouble code is active
 means that the trouble code has pending status
 means that the trouble code has stored status
Below are three buttons available:
![]()
It allows you to export data from the list of trouble codes – to the clipboard or file
![]()
It allows you to refresh the list of trouble codes
![]()
Clears the trouble codes memory in the module – if the trouble codes have ‘active’ status, they may not be erased until the fault is resolved.
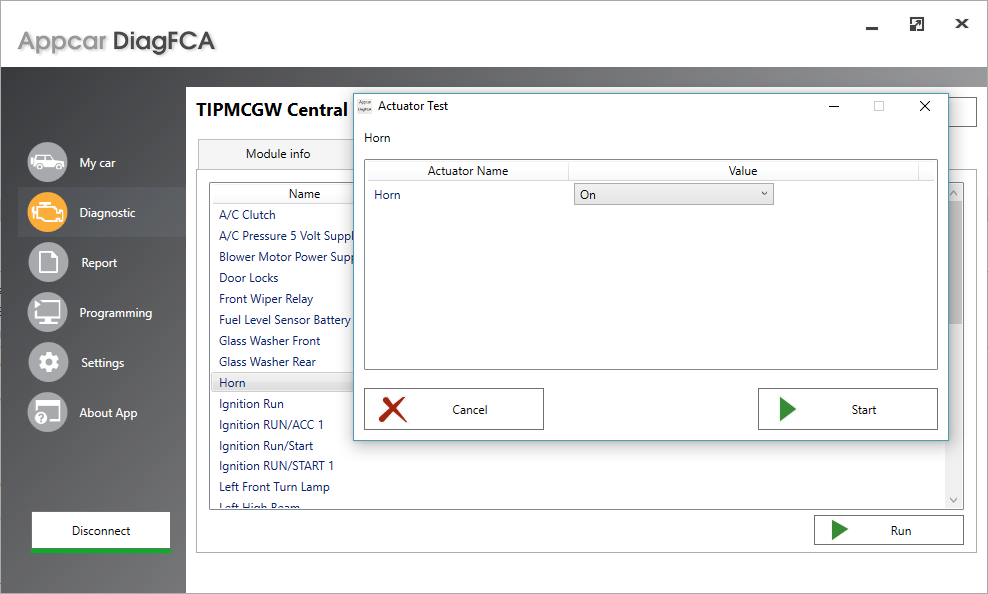
Actuators tab
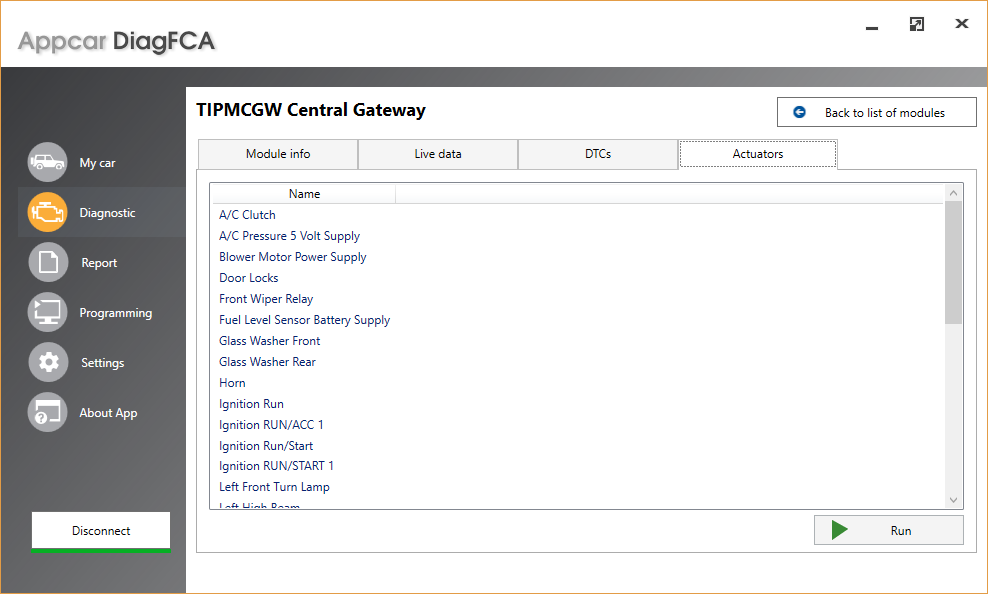
The “Actuators” tab allows you to control the actuators and tests available in the module.
Report tab
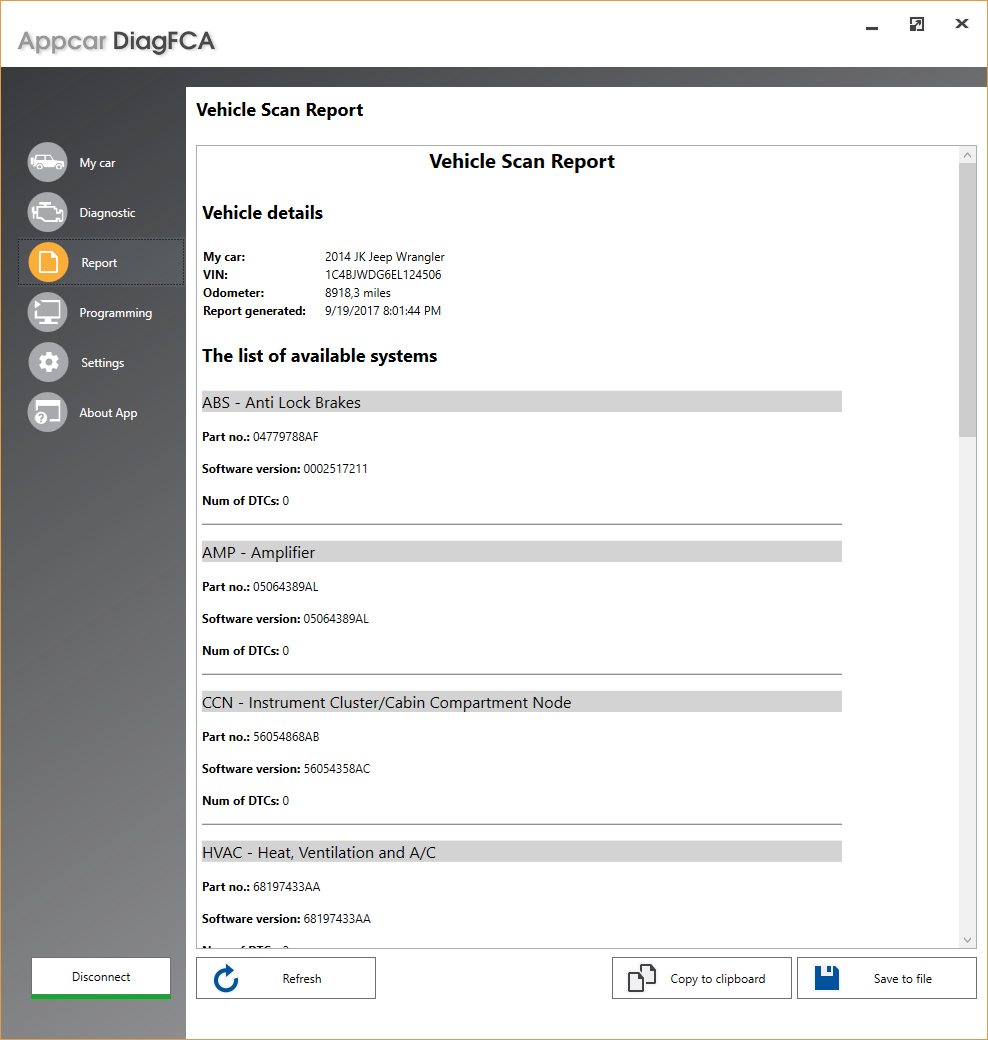
The “Report” tab contains the contents of the Vehicle Scan Report.
It can be found in it:
- basic vehicle data (model, year, VIN, odometer count)
- list of available systems, with a list of error trouble for each of them.
The report can be:
- copy to clipboard
- save to * .rtf text file
Programming tab
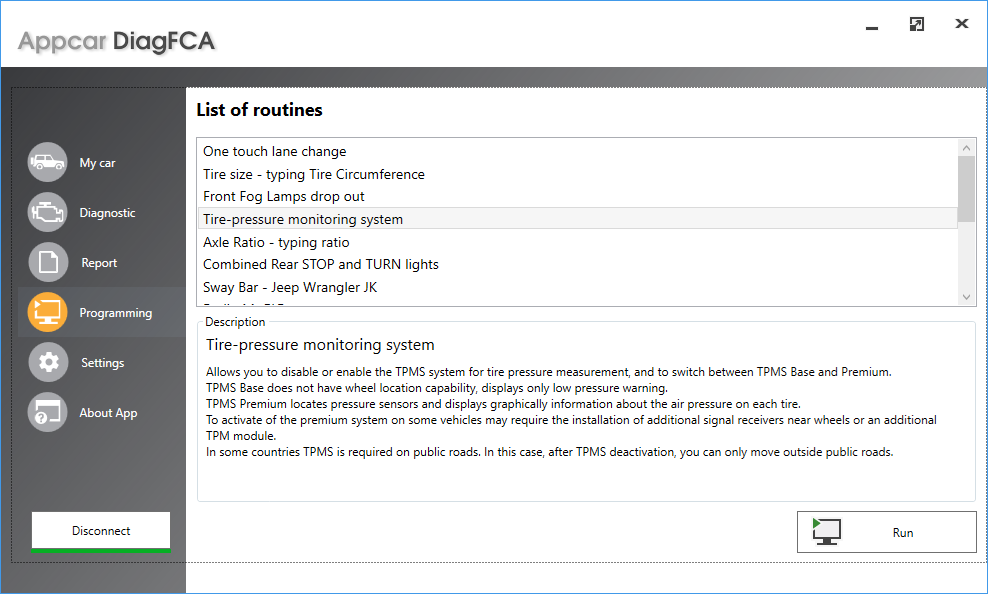
The “Programming” tab allows you to edit selected configuration parameters of the vehicle.
When using this tab, we recommend connect to the vehicle using the USB interface.
Our studies have shown that some Bluetooth and WiFi devices may not be able to save data in the vehicle, but some Bluetooth devices works propertly.
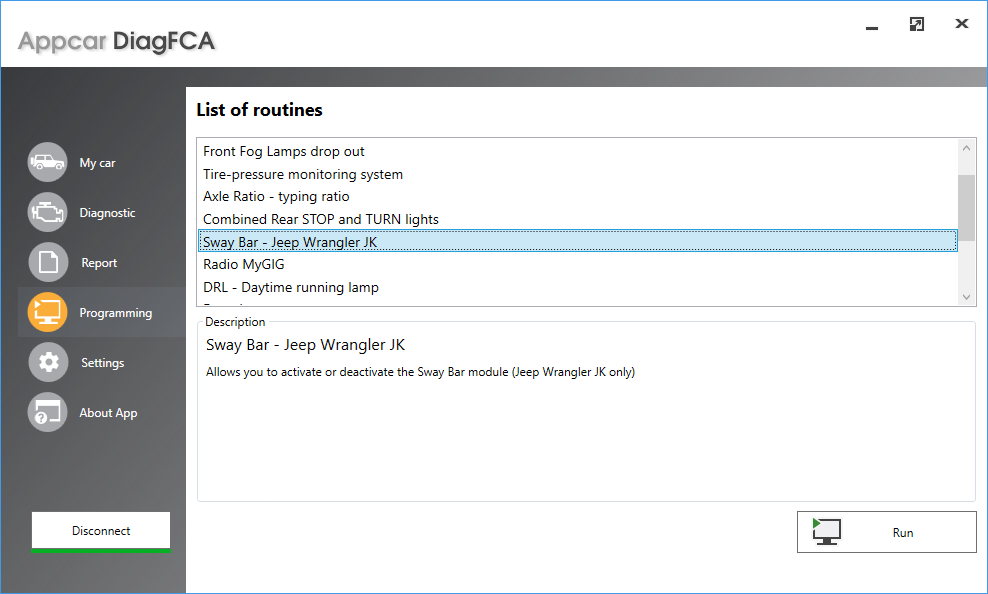
The list of available parameters for editing depends on the equipment of the vehicle and the version of systems installed in vehicle.
To edit the parameters, select the item from the list and click the “Run” button.
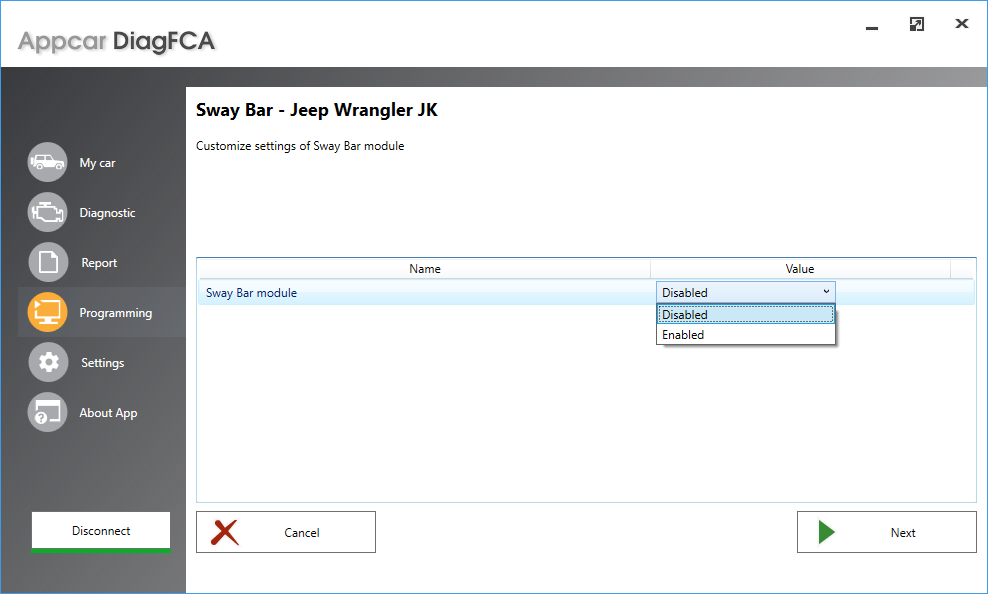
In the following steps set the values of the edited parameters.
The editing process can be aborted by clicking the “Cancel” button.
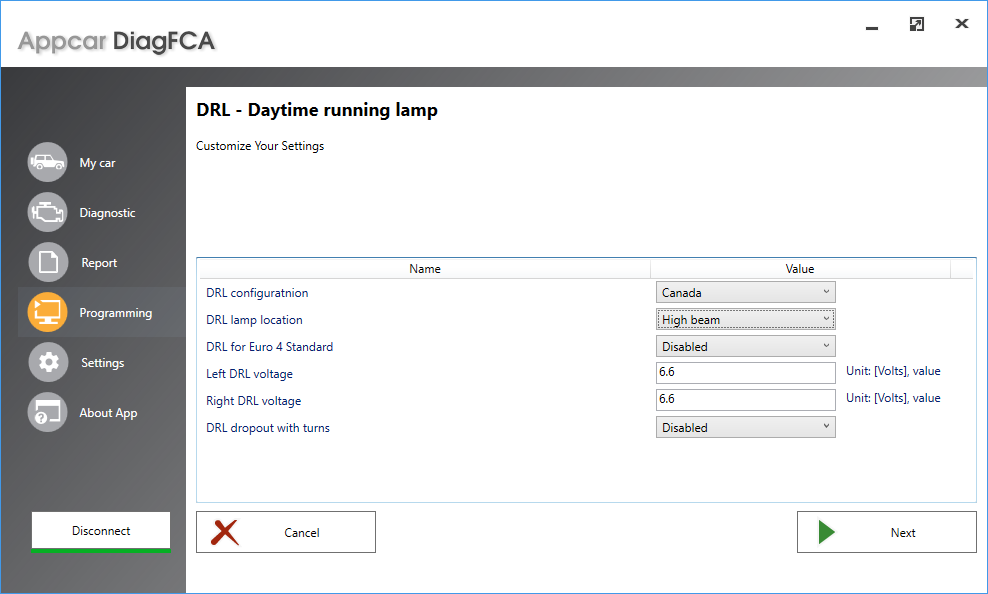
You can edit of available parameters
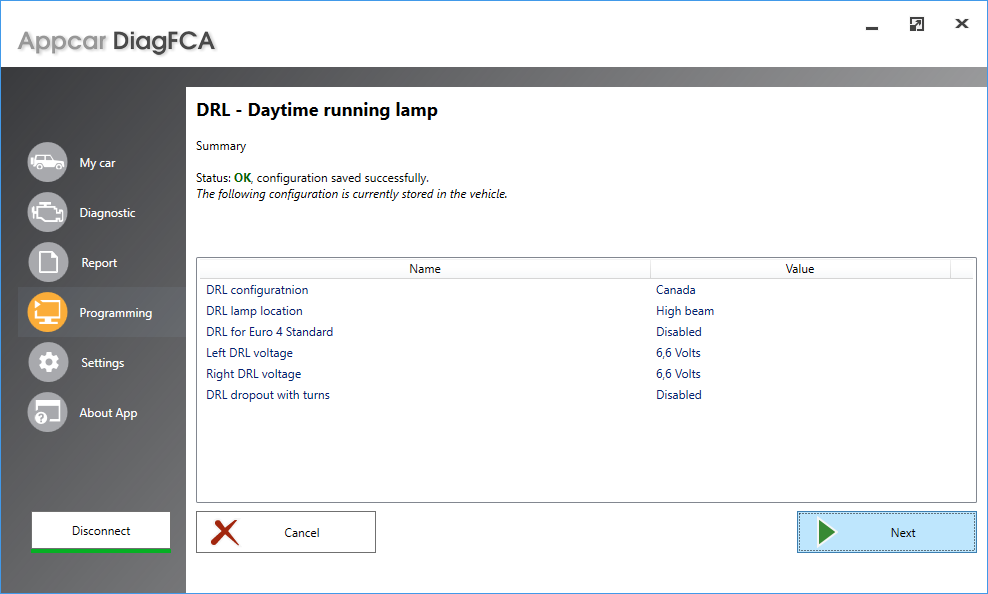
The last step in editing parameters – a summary is displayed:
- Programming Status: OK or ERROR
- List of parameter values saved after programming
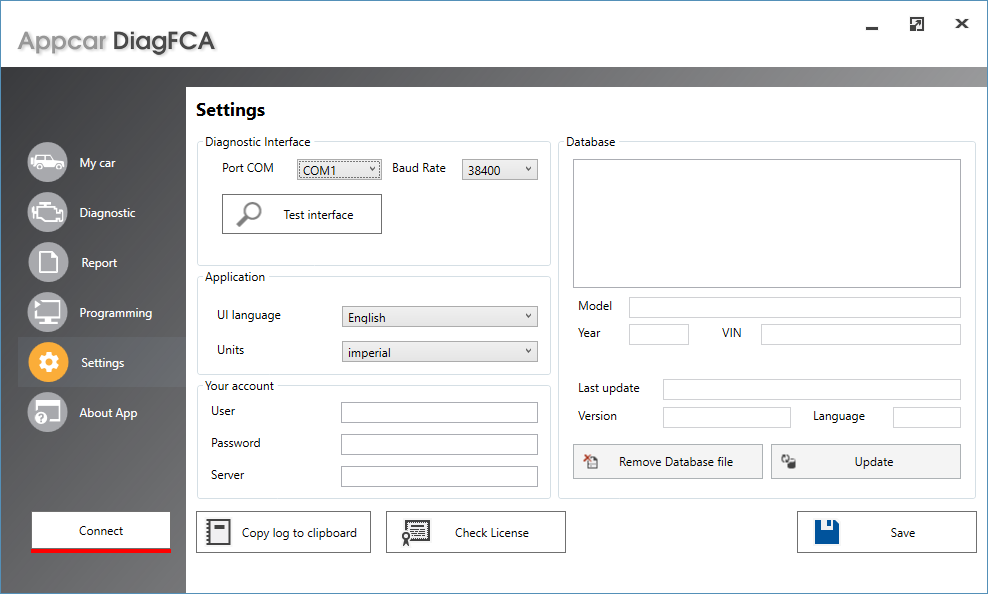
Settings tab
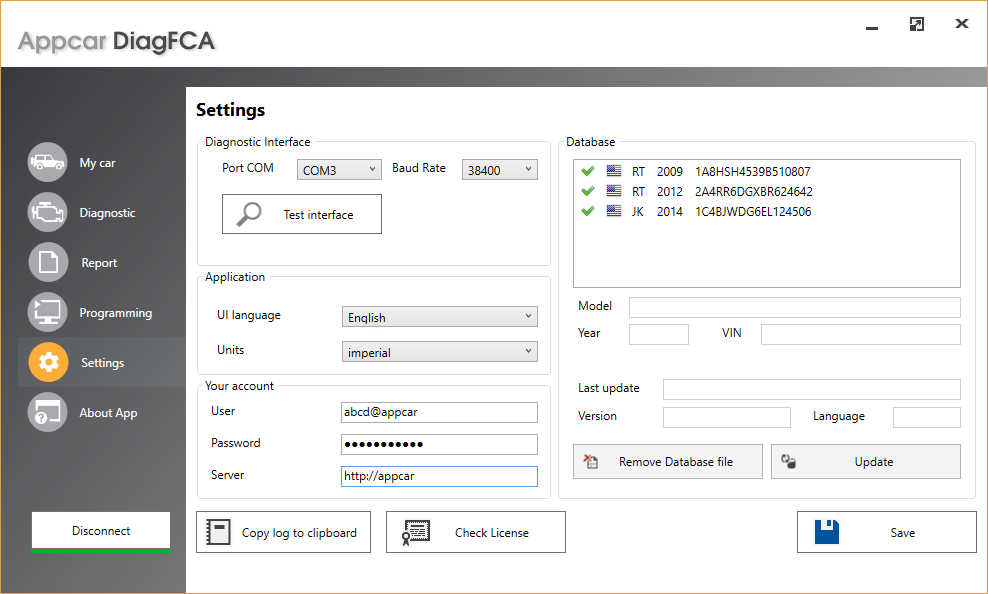
The “Settings” tab allows you to configure the application.
“Diagnostic Interface” area:
- Port COM – You can choose from the list of COM ports available in the system, which is used by the diagnostic interface
- Baud Rate – COM port data rate, for most ELM327 devices the parameter is 38400, 115200 for OBDLink SX or 9600 for some devices.
“Application” area:
- UI language – available options: Polski, English. Sets the language of the application.
- Units – available options: metric, imperial.
“Your account” area:
- User, Password & Server – Please complete the first time you start the application, using the data you received after you bought the application.
“Database” area:
- Items in the list indicate the availability of database files for vehicles with the VIN displayed
 means that the database is available in the application
 means that the database is not available locally and needs to be downloaded – click “Update”
- The fields below display detailed information about the database selected from the list:
- Model – model of vehicle
- Year – model year
- VIN – vehicle identification number
- Last update – date of database update
- Version – database version
- Language – database language (same as application language set when the database was retrieved)
- “Remove database file” button – deletes the database for selected VIN number
- “Update” button – allows you to update the database for selected VIN number. An Internet connection is required.
Each time you change settings, you need to approve them by clicking the “Save” button.
Software update
If a new version of the application is released, you can update it for free.
To do this:
- delete all databases (Settings tab),
- next uninstall the old version,
- then install a new version.
After installing a new version you may need to:
- write user data (Username, Password and Server)
- download new versions of databases when connected to a vehicle.